Dairy-Free Strawberry Pistachio Ice Cream

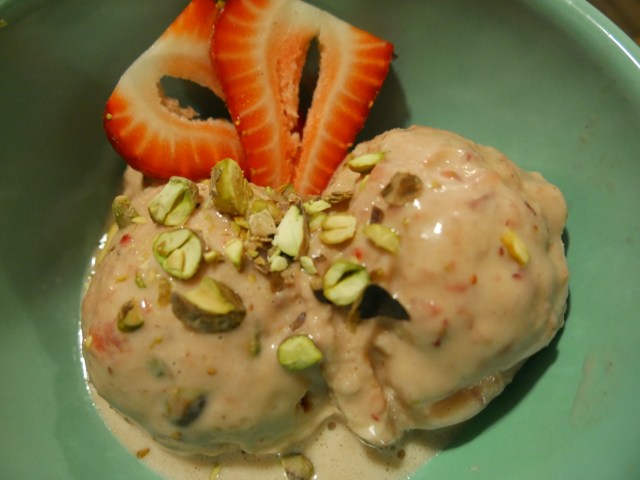
Well I seem to have gone on hiatus from blogging…. Oops. I didn’t stop experimenting in the kitchen though! Just lazzzzyyyy. I’m breaking the silence with something really cool and unique I came up with recently that is perfect for summer (and easy on the tummy). I have become a huge fan of nut milks recently (homemade!) and thought it would be really cool to make a custard base for ice cream using nut milk instead of heavy cream. My mom LOVES pistachio ice cream so I had some raw unsalted pistachios on hand… Why not make pistachio milk ice cream?! Strawberries are a perfect pairing for pistachios and since it’s summer they are in season. This could be made vegan by omitting the eggs but the result would be icier. The texture is somewhere between ice cream and sorbet and it’s the perfect amount of sweetness. Enjoy!

P1000077

What you’ll need:

  • 3 cups pistachio milk (recipe follows)
  • 6 egg yolks
  • 1 cup granulated sugar, divided
  • 1 tsp almond extract
  • 1 lb fresh strawberries, hulled and sliced
  • Juice from one lemon
  • 1/2 cup roasted pistachios

Directions:

  • Heat pistachio milk in a heavy saucepan over low heat until just simmering (do not boil!). Remove from heat.
  • While milk is heating whisk egg yolks and 3/4 cup sugar in bowl until light and frothy. Add a ladleful of hot milk to egg yolks to temper, whisking hard. Pour egg mixture back into saucepan with the remaining hot milk and stir to combine.
  • Return custard base to low heat and stir continuously until mixture coats the back of a wooden spoon, about five minutes (can take longer).
  • Pour custard through a mesh strainer into a clean bowl and add almond extract. Cool then refrigerate for at least two hours (I typically do overnight).
  • Combine strawberries in a bowl with lemon juice and 1/4 cup sugar. Let sit at room temperature for about 30 minutes.
  • Puree strawberries in a blender or food processor to desired consistency (I kept mine chunky). Add strawberries to custard base and refrigerate for another 30 minutes.
  • Churn mixture in an ice cream maker according to manufacturer’s instructions (I did mine in a Cuisinart machine for ~25 minutes). The ice cream should look like soft serve. Add roasted pistachios and churn for 30 seconds (or longer) to combine.
  • Eat right away if you prefer soft serve texture or freeze for an hour to produce a harder ice cream.
  • Enjoy!!


Pistachio Milk:

  • Soak 1 cup raw, unsalted pistachios in water for at least one day (I typically do two).
  • Rinse nuts then place in blender with 2 cups of water. Pulse to break up the nuts then blend on high power for a minute.
  • Pour mixture through cheese cloth placed into a mesh strainer. You may need to squeeze the cheese cloth to get all of the liquid out. You should end up with ~3 cups of pistachio milk.
  • Keep refrigerated and consume within 3 days.

Carrot Soup (with a twist)

IMG_4398

This is a long overdue post but I need to get it on the site before I totally forget the recipe! I made this early October when I wanted to savor the flavors of late summer as long as possible. I thought it would be nice to make a carrot soup but wanted it to taste light and refreshing (like summer). Typically you find carrots paired with ginger in soup recipes which is great for winter and the holidays but I wanted to try out some other flavors. I found that lemon and lots of dill make a delicious version to have on hand (i.e. in my freezer).

What you’ll need:

  • 2 tablespoons unsalted butter
  • 1 medium onion, chopped
  • 2 cloves garlic, chopped
  • 2 pounds carrots (typically equals 10 large carrots), scrubbed clean and sliced into 1/2-inch chunks
  • 1 teaspoon kosher salt
  • 6 cups homemade vegetable stock (chicken stock works too)
  • Juice from half of a lemon (probably 1-2 tablespoons depending on the juiciness of the lemon)
  • 3/4 cup chopped fresh dill (packed)
  • Freshly ground pepper
  • Optional toppings: toasted seeds, extra virgin olive oil, sour cream, etc…

Directions:

  • Melt butter in a large pot or Dutch oven over medium heat. Add onions and garlic and cook until onions are translucent and fragrant, about 5 minutes. Add carrots and salt and toss to combine. Add the broth and bring to boil then reduce heat to low and simmer until carrots are tender (about 30 minutes). Remove from heat and let cool completely.
  • Pour soup into a blender and puree until smooth. You can also use an immersion blender if you don’t have time to let the soup cool.
  • Return the soup to the pot and reheat. Add the lemon juice, dill, and pepper to taste.
  • Ladle soup into bowls and top with whatever you like (or nothing at all). Enjoy!

Tips:

  • It may seem like a lot of dill but trust me, the flavor is so mild that you need that much or potentially more. The dill can be replaced with other fresh herbs but probably need to reduce the amount depending on how strong of a flavor your herb of choice has (like rosemary or tarragon…).
  • The lemon juice can be replaced with orange juice for a different flavor profile. Might have to try that next time….

IMG_4401

Butternut Squash + Black Bean Chili

I got really busy with summer weekends away and then I just got lazy for a while… Now I’m back!

As soon as football season starts I crave chili but I’ve been trying really hard to limit my meat intake (probably too much cheeseburger pie…). Fall is also squash season so I wanted to try substituting butternut squash for the beef and it turned out so lovely! Think of this as a lightened up version of chili that doesn’t miss out on that beautiful, complex spice flavor. I’m not a vegetarian so there is still a bit of meat tucked in there but it’s very easy to leave out or replace. It may seem like there is a lot of chile in this recipe but it comes out surprisingly mild.

butternut squash chili

What you’ll need:

  • 4 strips of applewood smoked bacon, chopped into lardons
  • 1 yellow onion, diced
  • 1 red bell pepper, diced
  • 4 cloves garlic, minced
  • 1 jalapeño, minced (keep the seeds)
  • 3 tablespoons ancho chile powder
  • 1 tablespoon New Mexico chile powder (can replace with half ancho/half cayenne)
  • 1 tablespoon cumin
  • 2 tablespoons pureed chipotle in adobo
  • 1 tablespoon tomato paste
  • 1 bottle of dark beer (I use porter)
  • 1 28-oz can of crushed tomatoes
  • 3 cups chicken stock
  • 1 large (or 2 small) butternut squash, peeled, seeded, and chopped into 1/2-inch cubes
  • 2 15-oz cans of low-sodium black beans, drained and rinsed
  • Salt + pepper
  • Cilantro, green onions, grated cheddar cheese, and Mexican crema for garnish

Directions:

  • Add bacon lardons to a cold Dutch oven and place over medium heat. Cook until crispy then remove with a slotted spatula and place on a plate lined with paper towels. Reserve for garnish.
  • Saute the onions in the rendered bacon fat until translucent. Add bell pepper, garlic, and jalapeño and cook for another minute to soften. Add the chile powders and cumin and cook for 30 seconds then add the chipotle and tomato paste and cook an additional 30 seconds. The mix should be very potent!
  • Add the bottle of beer and deglaze, making sure to scrape the bottom of the pot to get all the good stuff. Once the liquid has almost completely cooked off and the mixture looks dark and pasty, add the crushed tomatoes, chicken stock, and squash. Return to a boil then lower heat to simmer. Let cook for 40-45 minutes uncovered or until the squash is fork-tender. Add black beans and cook for an additional 15 minutes. Check for seasonings and add salt/pepper to taste.
  • Let cool slightly then serve in individual bowls with toppings on the side. Enjoy!

Tips:

  • This could easily be vegetarian/vegan by omitting the bacon and using a couple tablespoons of olive oil to cook the veggies and replacing the chicken stock with vegetable or mushroom stock.
  • To get that complex chili flavor it’s necessary to have chiles, dark beer, and tomatoes. Besides that you can mess around with the rest of the ingredients. Try different types of chiles – powders or dried chiles (soaked in hot water and pureed)!

Roasted Chicken Bone Stock

Okay so I recently switched doing stock from the basic “throw it all in a pot” method to taking a few extra steps prior and the result is phenomenal. I took a knife skills class a few months ago and they taught us how to break down a whole chicken. You can usually find whole chickens for a cheaper price per pound than chicken breasts so why not buy the whole bird and use all the parts in the stock? Genius! I go to a snobby meat market because I love to know exactly where my meat lived it’s precious life and what it ate during that time. Anyway, they had these beautiful chickens from a farm in Sebastapol and I had to indulge. I broke down the chicken so I had the breast meat separated from the rest of the bones and cooked those for dinner (separate recipe). With the rest of the chicken (bones plus dark meat) I roasted them with some veggies before throwing them in the stock pot. The result is a deep, rich stock that is a great base to any soup or dish.

What you’ll need:

  • Bones + dark meat from a whole chicken
  • 3 carrots, roughly chopped
  • 4 celery stalks, roughly chopped
  • 1 onion, quartered
  • 4 garlic cloves (left whole)
  • Olive oil, salt + pepper
  • 1 tsp black peppercorns
  • Stalks from 1 bunch of parsley
  • 6 thyme sprigs
  • 1 bay leaf

Directions:

  • Combine chicken, carrots, celery, onions, and garlic on a rimmed baking sheet and coat with olive oil. Season with salt + pepper and roast in a 400 degree oven for 30-35 minutes. The veggies should be starting to caramelize and the bones should release some of their juice.
  • Add the remaining ingredients to a large stock pot. Top with the roasted ingredients and cover with cold water.
  • Bring stock to a boil then reduce heat and simmer for 3.5 to 4 hours.
  • Strain, let cool, then remove the layer of fat on the top.
  • Enjoy!

FullSizeRender 47FullSizeRender 52

Super Soup!

I make it a point to have some version of healthy soup in my freezer at all times. I try to pack it full of various vegetables and legumes and always use my own homemade chicken stock as the base. You never know when you’re going to wake up with a terrible cold (or hangover….) and you can barely muster up the energy to walk to the kitchen. The nutrients in this soup are guaranteed to make you feel better, whatever your ailment, and studies show that it might even work to prevent hangovers if consumed under the influence the night before 🙂

As with pretty much all of these recipes you can mix it up as you please. A standard soup starts with a mirepoix (onion, celery, carrots) so I suggest you start there and add what you like on top of that. I love chunks of carrots so I always keep those larger than the celery and onion. I had half of a red bell pepper in my fridge that I wanted to use up so it’s included in this recipe but I hadn’t added peppers before. It was good! The green veggies should be added in later to keep them green and al dente (soggy broccoli is not yummy). Blanching the broccoli first will keep the color the best but if you don’t have time you can add them straight into the pot. The spices in this recipe are similar to what you would use for a chili recipe so it produces a deep, rich, spicy flavor. The addition of tomato paste and dark beer also adds to the likeness to chili. You won’t even miss the ground beef!

What you’ll need:

  • 1 cup dried beans (I buy Rancho Gordo and mix it up with different shapes, sizes, and colors. Have fun!), soaked for 10 hours or overnight
  • 1 vegetable bouillon cube (if you don’t have this on hand just omit and make sure to salt the water liberally and throw in some veggies with the beans) FullSizeRender 40
  • 1 small yellow onion, diced
  • 3 stalks celery, diced
  • 3 medium carrots, roughly chopped
  • Half of a red bell pepper, diced
  • 3 cloves of garlic, minced
  • 1 tsp dried thyme
  • 1 tsp ancho chili powder
  • 1 tsp cumin
  • 1 tsp cayenne pepper
  • 1 tsp red chili flake
  • 1 tsp paprika (hot or sweet)FullSizeRender 41
  • 1 tsp kosher salt
  • 1/2 tsp freshly ground pepper
  • 2 T tomato paste
  • 1 cup of dark beer (I like porter or brown ale)
  • 1 bunch of red chard or any dark leafy green, roughly chopped
  • 1 crown of broccoli, chopped into florets and blanched
  • 6-8 cups of chicken stock (homemade!!!)

Directions:

  • Drain beans from soaking water and place in large pot (I use a pasta pot for easy draining later). Cover completely with water and add bouillon cube or fresh veggies. Bring water to a boil and simmer until tender. The time will vary depending on the size of the beans so just read the package and check on them a few times. They’ll cook more later in the soup but they should be at al dente.
  • In a large heavy pot or dutch oven, heat 2 tablespoons of olive oil on medium heat. Add onions and cook until translucent, about 3-5 minutes. Add celery and carrots and continue cooking for another 3-5 minutes. Add bell pepper and garlic and cook for an additional minute.
  • Add spices and tomato paste and cook for a minute (this takes the rawness out of the ingredients). Add the beer and deglaze the pot by scraping the bottom with a wooden spoon. Simmer until the alcohol is cooked out and the beer and spices glaze the veggies.
  • Add the chard and cook until it starts to wilt. Add in the broccoli, cooked beans, and chicken stock and stir to combine. Simmer on low for an hour to let the flavors meld together. Check for seasonings at the end, you’ll most likely need to add some more salt depending on how you like it.
  • Serve with some grated parmesan on top or chopped herbs. Freeze leftovers in single serving tupperware for an instant remedy 🙂FullSizeRender 43

TIPS:

  • Blanching broccoli: add florets to a pot of boiling, salted water and cook for a minute. Remove from pot with a slotted spoon or mesh strainer and immediately plunge into an ice bath. The broccoli will remain a vibrant green and the nutrients are locked in.
  • When choosing leafy greens for the soup avoid spinach or anything that quickly wilts/breaks down. You’ll end up with spinach mush. I like to use a green with a fibrous, firm stem so that it holds together throughout the cooking.

Italian Sausage & Mushroom Sauce

This was my mom’s go-to pasta sauce growing up and one that I started tinkering with when I was in college. It’s incredibly easy to whip up and follows my freezer food philosophy. I always like to keep some on hand frozen in single servings for those late nights when I need something hearty to soak up the booze or for when I need a quick meal. This has probably 1/100th of the amount of sodium you would get in a processed frozen meal and it’s way tastier. I have always made this sauce by memory and never bothered to pay attention to the amount of each ingredient I was using but here is my attempt at breaking it down.

Here’s what you need:

  • 1 small yellow onion (or half of a large one), choppedFullSizeRender 33
  • 2 hot Italian sausages, casings removed
  • 2 sweet Italian sausages, casings removed
  • 1 package sliced white or brown mushrooms
  • 1 red bell pepper, chopped
  • 4 cloves garlic, chopped
  • Salt + pepper
  • 3/4 cup of dry red wine
  • 1 jar of good quality marinara sauce (I typically use Rao’s)

Directions:

  • First, pour yourself a glass of wine. It’s Italian night!
  • It’s really important that you prep all of your ingredients before you start cooking as this sauce cooks quickly.
  • Heat 2 tablespoons olive oil in a large pot or dutch oven over medium-high heat.
  • Sauté onions until transparent and fragrant, about 5-7 minutes.FullSizeRender 31
  • Add sausage meat to onions and break apart with a wooden spoon.
  • Once sausage has browned, add mushrooms and stir constantly until they have released their juices, another 5 minutes or so.
  • Add bell pepper and garlic and cook for an additional 3-5 minutes then season with salt and pepper.
  • Carefully pour wine into pot and let reduce. It is VERY important that you take the time to let the sauce reduce until there is very little liquid left in the pot. If you skimp on this step you will be left with a looser sauce.
  • Add marinara sauce to the pot and stir to combine. Let simmer for at least 30 minutes to let the flavors develop.

TIPS

  • When cooking pasta it’s important to finish the cooking process in the sauce to “marry” the ingredients. Remove from the boiling water with a couple minutes to spare, add to a pot or pan with a serving of sauce, and let it cook on low heat for FullSizeRender 32another few minutes until al dente. I use spaghetti or a thicker noodle like bucatini.
  • Don’t forget the parmesan cheese 🙂
  • Modifications welcome! One time I made this with a chicken Italian sausage from Trader Joe’s instead of the typical pork version and it made for a much lighter sauce (yet also very delicious). Great for when you’re trying to eat lighter or during summer months.
  • My mom would use half ground beef and half sausage which also lightened up the flavor a bit. I prefer to use all sausage as I absolutely love the herbs and flavorings but it was a good option for kids or those that can’t handle the heat (it turns out SPICY!). Also using all sweet Italian sausage would work too.

Roasted Veggie Soup

I always make sure to have soup of some sort frozen in single portions in my freezer as they are super easy to defrost for a quick dinner aaaaand they’re healthy! This soup is particular easy to make and adapt based off of what’s in season. Since it’s winter this recipe includes a lot of root vegetables however it’s easy to switch it up and do different types of squash or potatoes.FullSizeRender 34

Here’s what you need:

  • 2 carrots, peeled and chopped into 1-inch pieces
  • 2 parsnips, peeled and chopped into 1-inch pieces
  • 2 turnips, peeled and chopped into 1-inch pieces
  • 2 fennel bulbs, thickly sliced
  • 2 garlic cloves, peeled and kept whole
  • Olive oil
  • 4 Tbs curry powder
  • Salt + pepper
  • 3-4 cups chicken stock, preferably homemade

Directions:

  • Preheat oven to 425 degrees
  • Coat veggies in olive oil and toss with curry powder and salt and pepper to taste
  • Place ingredients in a roasting pan and bake until tender (45 – 60 minutes)
  • Let veggies cool completely before moving to the next step
  • Place cooled veggies in a blender with 3 cups of the chicken stock and puree to a smooth consistency. Add additional chicken stock until the soup is at preferred thickness.
  • Transfer soup to a pot and reheat, letting the flavors come together again. Adjust seasonings to taste and serve hot.

TIPS:

  • I like to make the veggies the night before I want to make the soup so that they are already cooled and ready to puree the next night. Also this is a perfect way to transform leftover roasted vegetables from a dinner party!
  • If you want to make the soup silkier feel free to add a couple tablespoons of heavy cream at the very end. I personally don’t think this step is necessary but everyone has their own opinions.
  • Toppings! I like to top with toasted pumpkin seeds or croutons (whatever is on hand). Also a dollop of crème fraîche or sour cream would be lovely!

Homemade Chicken Stock

A fully stocked freezer is one of the most important things for a single foodie in the city (and arguably anyone anywhere). One thing I always make sure I have on hand is homemade chicken stock. I typically make a batch and use half in a soup which I freeze in single portions and then freeze the other half as is. You never know when you’re going to need some stock – whether it be the urge to make a quick homemade soup (I’m a sucker for matzoh ball) or when you come down with the flu and the only glimmer of hope in your life is having chicken broth on hand. My friends think I’m fancy when I mention making my own stock… I think they’re silly for not knowing how easy and cheap it is.

Here’s what you need:

  • Whole roaster 4-5 lb. chicken (Don’t get the most expensive, super organic/farm-raised/whatever chicken but also don’t get the cheapest. I typically go for a trustworthy organic brand)

    Throw it all in a pot and add water!

    Throw it all in a pot and add water!

  • 1 onion (unpeeled, quartered)
  • 2 carrots (unpeeled, quartered)
  • 2 celery stalks (untrimmed, quartered)
  • 6 garlic cloves (unpeeled)
  • Fresh herbs (Whatever I have on hand typically. Go light on the rosemary as it can overpower the stock. I love using thyme sprigs and parsley stalks. Try 8 thyme sprigs, 10 parsley sprigs, and one rosemary sprig)
  • 2 bay leaves
  • 1 tsp black peppercorns
  • 2 tsp kosher salt (I like to use minimal salt when making broth and add it later when I make soups)

Directions:

  • Combine all ingredients in a large stock pot and fill with water (about 2.5 quarts)
  • Bring to a boil then turn the heat down to low
  • After a couple minutes you will start to see scum forming around the edges. Take a spoon and remove this once (it won’t come back!)

    Get that scum!

    Get that scum!

  • After 3.5 hours or so (this is not an exact science) remove from the heat and strain the liquid into a clean container (I usually use another pot)
  • Set stock in the fridge overnight so that the fat solidifies and floats to the top. This step makes it so much easier to remove the fat however if you are in a time crunch you can use a baster and soak up the liquified fat after you strain it.

And now you have about 7-8 cups of chicken stock! That’s the equivalent to two of the boxed chicken stocks you buy from the store but much more delicious AND cheaper. It is very common that the stock turns out gelatinous. This is totally normal (freaked me out the first time though!) and comes from the natural gelatin that is released from the chicken bones.

TIPS:

  • If you are making a soup with chicken meat in it you can remove the chicken from the simmering liquid after about 45 minutes and cut the breast meat from the bone. Return the rest of the bones and dark meat to the stock for flavor. Don’t use the meat at the end of the process as literally all of the flavor has imparted from it
  • Try mixing things up! If you want to make an Asian soup replace the herbs with lemongrass, basil, cilantro, etc and thrown some chilis in there. Yum!