Chocolate Peppermint Brownie Cookies

Is a brownie cookie called a brookie? Is that a thing? Brownie cookie seems like too many words for the modern person so am thinking we call these brookies. Regardless, these are delicious and easy and beautiful. Too bad we ate them before I could take a picture…. Guess we’ll need to make another batch 🙂

What you’ll need:

  • 1/3 cup all-purpose flour
  • 1/3 cup cocoa powder (unsweetened)
  • 3/4 teaspoon baking powder
  • 3/4 teaspoon kosher salt
  • 8 ounces bittersweet chocolate (fine to use chocolate chips or you can chop up a bar of chocolate)
  • 1/4 cup unsalted butter (1/2 stick)
  • 2 large eggs, room temperature
  • 1/2 cup granulated sugar
  • 1/4 cup brown sugar
  • 1 teaspoon vanilla extract
  • 1/4 teaspoon peppermint extract
  • 4 ounces chocolate chips (bittersweet or semisweet — whatever you have on hand)
  • Crushed candy canes for garnish

What to do:

  • Preheat oven to 350 degrees (convection is always best for baking if you have that option). Whisk together flour, cocoa powder, baking powder, and salt in a medium bowl. Set aside.
  • Combine the 8 ounces of bittersweet chocolate and the butter in a small heatproof bowl. Bring about an inch of water to a boil in a small saucepan, reduce to a simmer, then set bowl on top (make sure bottom of bowl doesn’t touch the water). Stir chocolate and butter until completely melted then remove from saucepan and let cool.
  • Combine eggs and both sugars in the bowl of an electric stand mixer fitted with the whisk attachment. Beat on medium speed to combine then increase speed to high and beat until pale and fluffy (about 5 minutes). Scrape down sides of bowl as needed to make sure everything is properly combined. Add vanilla and peppermint extracts and beat to incorporate.
  • Add the chocolate and butter mixture to the eggs and sugar and beat on medium speed to combine. Reduce speed to low and slowly add in flour mixture until just incorporated. Remove bowl from mixer and give the dough a good stir to make sure everything is well combined. Fold in the 4 ounces of chocolate chips.
  • Using a small scoop or tablespoon measure out dough onto baking sheets lined with parchment spacing each scoop 3 inches apart. You should get about 18 portions. Top each cookie with a good pinch of crushed candy cane. Bake about 8 minutes or until surface is crinkly and edges are firm, rotating sheets top to bottom halfway through.
  • Let cookies cool for a few minutes on the baking sheets then transfer to a wire rack to cool completely.

Saumur

I have to be honest, the first region I drew from the bucket was actually Lodi but I just couldn’t bring myself to kick off this project with some place local. So I snuck the little piece of paper back into the mix and tried again, this time pulling Saumur! It was perfect… I had never heard of this place and I was so excited to explore.

Saumur is located right in the middle of the Loire Valley in France and was once only known for its sparkling wines. Modern technology and better farming has allowed for a variety of beautiful still wines to flourish in the last few decades. The main grapes here are Chenin Blanc and Cabernet Franc. We opted for a Chateau de Breze (sorry couldn’t figure out how to easily add all the fun French embellishments to the letters) for the white wine and a Saumur Rouge from Domaine Collier.

P1000148        P1000150

This region is known for its fresh water fish, produce such as potatoes and shallots and locally-made goat cheese. We made trout with beurre blanc sauce, baby potatoes smothered in butter, and haricot vert cooked with shallots (oh, and butter).

P1000155

The Chateau de Breze had a beautiful floral nose but then it punched you in the mouth with acidity. It was honestly a bit shocking at first but the mouth puckering was a perfect complement to the butter on butter on butter we were eating. We ended up enjoying this quite a lot! I could see why they used these grapes for sparkling wine for so long. We finished off our meal with some French goat cheese that was absolutely delicious and paired remarkably with the Domaine Collier. The wine had a beautiful earthiness to it along with good fruit and acid. We felt so French enjoying our lovely wine with our lovely cheese! These were two awesome wines that were so different from what we’re used to drinking and overall a wonderful way to kick off this project! Too bad it was a Thursday and we had to deal with a wine hangover the next day at work…..

A New Journey Begins…

I’m a solid 6 months into my 30’s and instead of freaking out about how my life isn’t where I thought it would be and oh em gee I’m so old now I’ve decided to take on a personal growth project (btw, I don’t think either of those things but according to some of my friends I’m supposed to be having a crisis). On a recent lazy weekend morning I decided to stop watching whatever Food Network rerun was playing and noticed our rather sad looking bookshelf needed some interesting books. I think it’s fair to judge a person by whatever books they have on their shelves so these needed to really make an impact. I decided to scour the interwebs for inspiration and came across The World Atlas of Wine. worldatlasofwine
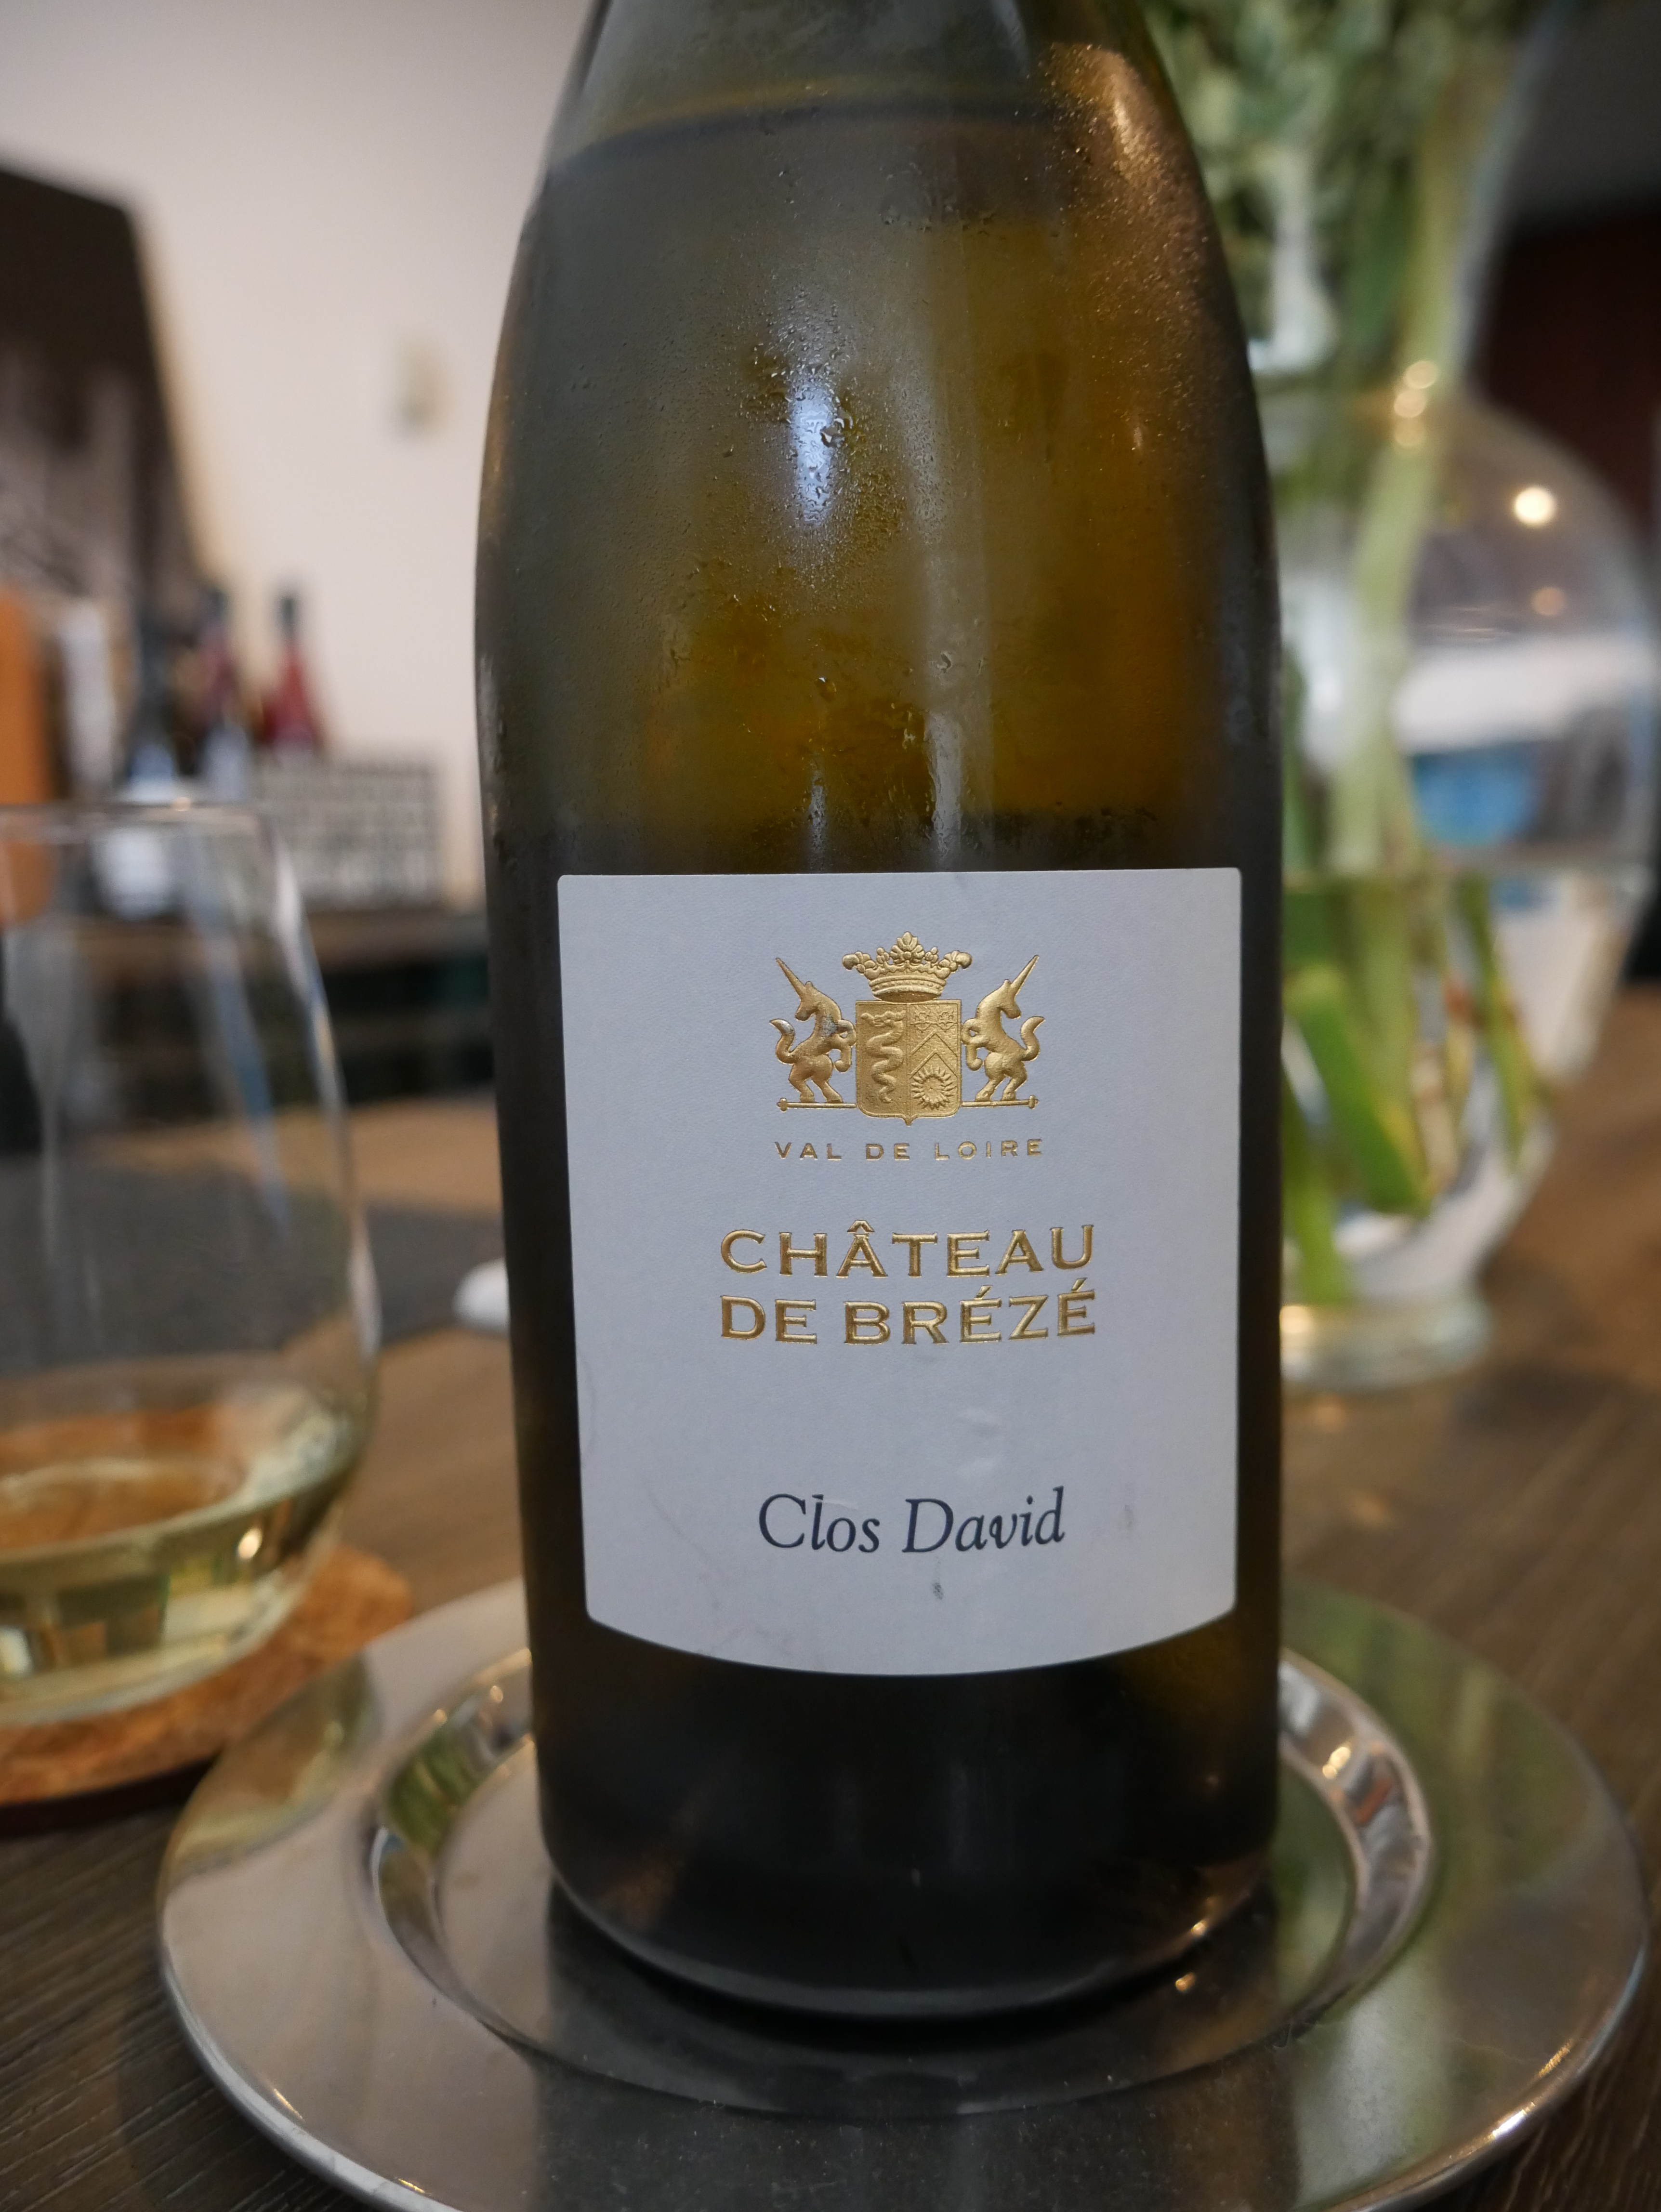
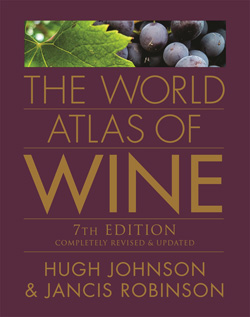
Now anyone that works in the wine industry has heard of this book and actually most refer to it as the only resource any oenophile needs in their life. SOLD. Two days later it was in my hands and I’ve been immersed in it ever since. If you really want to feel like you know nothing about wine I highly recommend reading this book! I had no idea there were so many wine growing regions of the world! Have you ever heard of wines from Costantia or Kremstal? Did you know China produces wine? How in the world was I going to learn it all?! The solution is this: Every week, Jon and I will draw one region at random and procure one red and one white from said region. To round out the experience we’re going to cook up a local dish that’s meant to pair with the wine (hopefully!). In true Jordan fashion I’ve already completed two weeks and am now just getting around to blogging but I have promised myself to be more consistent. So fingers crossed we complete the project (there has to be over 100 regions!!!) and have an amazing time doing it.

Braised Chicken Thighs with Eggplant and Tomatoes

This is a super yummy, easy, healthy, one-pot wonder. I first made this because I had chicken in my fridge and an eggplant I needed to use up. Everything else is stuff you would normally find in your pantry. This is also one of those meals you can toss in whatever veggie or herb you have on hand and if you don’t like eggplant, leave it out! The sauce is really tasty as well so make sure to serve it over some cous cous or rice (or pasta!).

Things you’ll need:

  • 1 lb skin-on, bone-in chicken things (or breasts)
  • 1/4 cup olive oil, divided
  • 1 large onion, halved and sliced into thin half-moons
  • 2 garlic cloves, minced
  • 1 large eggplant, cut into 1-inch cubes
  • 2 tsps chopped fresh rosemary
  • 1 tsp crushed red pepper
  • 1 28 oz can diced tomatoes (with juice)
  • 1 T capers, drained
  • 1 T fresh lemon juice (from 1/2 lemon)
  • Salt + pepper

What to do:

  • Pat chicken thighs dry and season both sides with salt and pepper. Heat 1 tablespoon of olive oil in a heavy dutch oven or large pot over medium-high heat. Place chicken thighs skin side down in an even layer (may need to do in two batches if you run out of room). Cook chicken until skin is brown and crispy, about 5 minutes. Flip and cook on other side for another 2 minutes. Remove chicken from dutch oven and reserve on a plate.
  • Turn heat down to medium and add onions to the dutch oven. You may need to add a little oil if the pot looks dry so that the onions don’t stick and burn. Scrape bottom of dutch oven with a wooden spoon to get all the yummy chicken bits. Cook onions for 5 minutes or until translucent. Add garlic and cook an additional minute. Add the remaining 2-3 tablespoons olive oil and eggplant. Cook for 5 minutes or until eggplant is soft and brown. Add rosemary and crushed red pepper and cook for another minute.
  • Add tomatoes with their juice and the capers to the vegetable mixture and stir to combine. Bring to a boil then turn heat down to low. Return chicken to the pot, skin side up, and cook for 10 minutes or until chicken is cooked through. Check for seasonings and add salt and pepper to taste and finish with the lemon juice.

Collard-Wrapped Chicken Enchiladas

2016 was not a good year for many reasons, and it seemed to impact my ability to post recipes. Not that I didn’t cook often…. Just prioritized my hunger over taking pictures and capturing every ingredient and step :-/ Of all the wonderful recipes I cooked last year and neglected to share, this one stuck with me the most. I first put this recipe together last fall after I received a bunch of collard greens in a produce delivery box. The only time I had ever had a collard was in the south and they had been slow cooked to the point that they hardly resembled the beautiful bright green HUGE leaves that they once were. My raw vegan friend had been using collards to make veggie wraps and that seemed like an interesting – albeit bland – route to go. I decided I would take a stab at using the collards as some sort of wrap but I would definitely be cooking them and definitely be incorporating meat some way. After clicking around through a handful of recipes I landed on enchiladas and I was happily surprised with the end result. I just moved into a new, awesome apartment with my boyfriend and I knew I wanted to recreate this dish ASAP and this time I remembered to take pictures. I love making my own sauce but that’s totally not necessary for this recipe (bottled enchilada sauce works fine, maybe even better).

img_0102

Ingredients:

  • 2 T vegetable oil
  • 2 tsp cumin
  • 2 tsp ancho powder
  • 1/2 tsp cayenne
  • 1/2 tsp chili powder
  • 1/4 tsp salt
  • 1/8 tsp freshly ground pepper
  • 2 boneless skinless chicken breasts
  • 1 red onion, chopped
  • 3 garlic cloves, chopped
  • 1 cup corn (fresh or thawed from frozen)
  • 1/2 cup cilantro, chopped
  • 1 1/2 cups enchilada sauce (bottled or homemade)
  • 6 extra large collard greens, stems removed from leaves
  • 1 cup shredded Mexican blend cheese
  • 1/2 cup cotija cheese, crumbled
  • Toppings: chopped cilantro, sour cream, cotija cheese

Directions:

  • Preheat oven to 350 degrees.
  • Heat oil in a heavy cast iron over medium high heat. Combine spices and season both sides of the chicken breasts. Cook chicken through, approximately 7 minutes per side. Set chicken on a plate off to the side. When chicken is cool enough to handle, shred by hand.
  • Add onions to the pan with the chicken drippings and sautĂ© until translucent, approximately 5 minutes. Add garlic and corn and continue cooking for another minute. Add shredded chicken, cilantro and 1/2 cup of the enchilada sauce and stir to combine. Remove from heat until ready to assemble.
  • Blanch the collard greens by cooking in boiling, salted water for 15 seconds. Remove to a baking sheet lined with paper towels to dry.
  • Spread 1/2 cup enchilada sauce on the bottom of a 9×13 dish. Spoon 1/4 cup of chicken filling into each collard green and fold / roll to seal. Place each enchilada in the dish, seam side down. Cover enchiladas with remaining 1/2 cup of enchilada sauce and both cheeses.
  • Bake for 15 minutes or until the cheese is bubbly and melted. Serve with toppings.

Pineapple Glazed Chicken with Mango Avocado Salsa

There is an amazing Bobbly Flay recipe for Pineapple Mustard Glazed Swordfish in his Mesa Grill cookbook that was my inspiration for this recipe. I decided to omit the mustard and instead use gochujang (Korean fermented chili paste) for a different flavor profile. Gochujang has a very complex flavor – it’s spicy but not overpowering, and savory from the fermentation process. It’s used in pretty much every Korean dish from kimchi to bibambap. Living in San Francisco I can find this pretty easily but it can be replaced with chipotle puree or even ancho chili powder. I served the chicken with cilantro-lime cauliflower rice and a super easy veggie stir fry. Healthy!!

P1000063

What you’ll need:

  • 1 cup pineapple juice
  • 1/3 cup rice wine vinegar
  • 1 tablespoon soy sauce
  • 1 tablespoon ginger, peeled and minced
  • 3 tablespoons light brown sugar
  • 2 tablespoons gochujang
  • 2 tablespoons lime juice, divided
  • 1 mango, peeled and chopped into bite size pieces
  • 1 avocado, peeled and chopped into bite size pieces
  • 1/2 jalapeño, minced
  • 1/4 cup red onion, minced
  • 1/4 cup cilantro, chopped
  • 2 boneless skinless chicken breasts
  • Salt + pepper
  • Olive oil

Directions:

  • Combine pineapple juice, rice wine vinegar, soy sauce, ginger, and brown sugar in a saucepan and bring to a boil. Reduce heat and let simmer until reduced by half, about 30 minutes. Add gochujang and cook for an additional 2 minutes. Remove from heat and add 1 tablespoon of lime juice. Let cool.
  • Combine mango, avocado, jalapeño, onion, cilantro, and remaining 1 tablespoon lime juice in a bowl and gently stir to combine. Set in fridge until ready to use.
  • Heat 1 tablespoon olive oil in skillet over medium-high heat. Season chicken breasts with salt and pepper on both sides and place in skillet. Cook on first side for about 2 minutes (until slightly golden brown) then flip.
  • Use a brush or spoon to coat first side of chicken with the pineapple glaze while the second side cooks for a few minutes. Flip and coat the second side with the glaze. Continue flipping and glazing until chicken is cooked through (about 6 more minutes, depending on thickness of chicken).
  • Serve chicken with mango avocado salsa on top. Enjoy!

Dairy-Free Strawberry Pistachio Ice Cream

Well I seem to have gone on hiatus from blogging…. Oops. I didn’t stop experimenting in the kitchen though! Just lazzzzyyyy. I’m breaking the silence with something really cool and unique I came up with recently that is perfect for summer (and easy on the tummy). I have become a huge fan of nut milks recently (homemade!) and thought it would be really cool to make a custard base for ice cream using nut milk instead of heavy cream. My mom LOVES pistachio ice cream so I had some raw unsalted pistachios on hand… Why not make pistachio milk ice cream?! Strawberries are a perfect pairing for pistachios and since it’s summer they are in season. This could be made vegan by omitting the eggs but the result would be icier. The texture is somewhere between ice cream and sorbet and it’s the perfect amount of sweetness. Enjoy!

P1000077

What you’ll need:

  • 3 cups pistachio milk (recipe follows)
  • 6 egg yolks
  • 1 cup granulated sugar, divided
  • 1 tsp almond extract
  • 1 lb fresh strawberries, hulled and sliced
  • Juice from one lemon
  • 1/2 cup roasted pistachios

Directions:

  • Heat pistachio milk in a heavy saucepan over low heat until just simmering (do not boil!). Remove from heat.
  • While milk is heating whisk egg yolks and 3/4 cup sugar in bowl until light and frothy. Add a ladleful of hot milk to egg yolks to temper, whisking hard. Pour egg mixture back into saucepan with the remaining hot milk and stir to combine.
  • Return custard base to low heat and stir continuously until mixture coats the back of a wooden spoon, about five minutes (can take longer).
  • Pour custard through a mesh strainer into a clean bowl and add almond extract. Cool then refrigerate for at least two hours (I typically do overnight).
  • Combine strawberries in a bowl with lemon juice and 1/4 cup sugar. Let sit at room temperature for about 30 minutes.
  • Puree strawberries in a blender or food processor to desired consistency (I kept mine chunky). Add strawberries to custard base and refrigerate for another 30 minutes.
  • Churn mixture in an ice cream maker according to manufacturer’s instructions (I did mine in a Cuisinart machine for ~25 minutes). The ice cream should look like soft serve. Add roasted pistachios and churn for 30 seconds (or longer) to combine.
  • Eat right away if you prefer soft serve texture or freeze for an hour to produce a harder ice cream.
  • Enjoy!!


Pistachio Milk:

  • Soak 1 cup raw, unsalted pistachios in water for at least one day (I typically do two).
  • Rinse nuts then place in blender with 2 cups of water. Pulse to break up the nuts then blend on high power for a minute.
  • Pour mixture through cheese cloth placed into a mesh strainer. You may need to squeeze the cheese cloth to get all of the liquid out. You should end up with ~3 cups of pistachio milk.
  • Keep refrigerated and consume within 3 days.

Carrot Soup (with a twist)

IMG_4398

This is a long overdue post but I need to get it on the site before I totally forget the recipe! I made this early October when I wanted to savor the flavors of late summer as long as possible. I thought it would be nice to make a carrot soup but wanted it to taste light and refreshing (like summer). Typically you find carrots paired with ginger in soup recipes which is great for winter and the holidays but I wanted to try out some other flavors. I found that lemon and lots of dill make a delicious version to have on hand (i.e. in my freezer).

What you’ll need:

  • 2 tablespoons unsalted butter
  • 1 medium onion, chopped
  • 2 cloves garlic, chopped
  • 2 pounds carrots (typically equals 10 large carrots), scrubbed clean and sliced into 1/2-inch chunks
  • 1 teaspoon kosher salt
  • 6 cups homemade vegetable stock (chicken stock works too)
  • Juice from half of a lemon (probably 1-2 tablespoons depending on the juiciness of the lemon)
  • 3/4 cup chopped fresh dill (packed)
  • Freshly ground pepper
  • Optional toppings: toasted seeds, extra virgin olive oil, sour cream, etc…

Directions:

  • Melt butter in a large pot or Dutch oven over medium heat. Add onions and garlic and cook until onions are translucent and fragrant, about 5 minutes. Add carrots and salt and toss to combine. Add the broth and bring to boil then reduce heat to low and simmer until carrots are tender (about 30 minutes). Remove from heat and let cool completely.
  • Pour soup into a blender and puree until smooth. You can also use an immersion blender if you don’t have time to let the soup cool.
  • Return the soup to the pot and reheat. Add the lemon juice, dill, and pepper to taste.
  • Ladle soup into bowls and top with whatever you like (or nothing at all). Enjoy!

Tips:

  • It may seem like a lot of dill but trust me, the flavor is so mild that you need that much or potentially more. The dill can be replaced with other fresh herbs but probably need to reduce the amount depending on how strong of a flavor your herb of choice has (like rosemary or tarragon…).
  • The lemon juice can be replaced with orange juice for a different flavor profile. Might have to try that next time….

IMG_4401

Spicy Chilaquiles Rojos

Jon and I have been upping our breakfast game. Why go spend $50 at brunch when you can do it at home for half that? Chilaquiles is one of my absolute favorite breakfast items but a lot of times they can come out one-note and get boring after a few bites. This version does not disappoint and serving with a side of bacon and sliced avocado rounds it out into a very yummy meal.

2015-09-29

What you’ll need:

  • 1/2 cup of dried chiles de arbol (the small red ones)
  • 2 tablespoons vegetable oil
  • 1 white onion, chopped
  • 2 garlic cloves, chopped
  • 1 28-oz can of whole tomatoes, drained
  • 1 jalapeño, chopped
  • Salt + pepper
  • ~1/2 lb of tortilla chips (use your best judgement, I definitely didn’t measure)
  • 4 eggs
  • Toppings: sliced radishes, Mexican crema, cotija cheese, chopped cilantro, lime wedges, avocado slices

Directions:

  • Place dried chiles in a bowl and cover with hot water. Set aside for 10 minutes then drain.
  • While the chiles are rehydrating heat the vegetable oil in a cast iron skillet over medium heat. Add the onion and cook until translucent, about 5 minutes. Add the garlic and cook an additional minute. Place the cooked vegetables along with the oil into a blender along with the chiles, tomatoes, and jalapeño. Blend until smooth then return to the cast iron skillet. Check for seasonings and add salt and pepper to taste. The sauce will be SPICY but don’t worry, it will cool down with the addition of the chips and toppings.
  • Reheat the sauce over medium heat for 2 minutes then lower the heat and add the tortilla chips. Cook the chips in the sauce for 2-3 minutes or until they just start to soften (not too much, you don’t want soggy chilaquiles!). While the chips are cooking in the sauce cook up the eggs however you prefer – sunny side up, over easy, poached, etc. You definitely want to have a runny yoke.
  • Place the chips on individual plates and top with 2 eggs each. Drizzle crema over the top and serve with the additional toppings. Enjoy!

Tips:

  • This recipe serves 2 hearty brunches so double for 4 people.
  • If the sauce is too thick add low-sodium chicken stock or water to thin it out.
  • I really think that chilaquiles needs a meat with it so it doesn’t get boring quickly. A lot of recipes call for shredded chicken which I think would be really yummy in this recipe. Just add with the chips and toss in the sauce to coat.

Butternut Squash + Black Bean Chili

I got really busy with summer weekends away and then I just got lazy for a while… Now I’m back!

As soon as football season starts I crave chili but I’ve been trying really hard to limit my meat intake (probably too much cheeseburger pie…). Fall is also squash season so I wanted to try substituting butternut squash for the beef and it turned out so lovely! Think of this as a lightened up version of chili that doesn’t miss out on that beautiful, complex spice flavor. I’m not a vegetarian so there is still a bit of meat tucked in there but it’s very easy to leave out or replace. It may seem like there is a lot of chile in this recipe but it comes out surprisingly mild.

butternut squash chili

What you’ll need:

  • 4 strips of applewood smoked bacon, chopped into lardons
  • 1 yellow onion, diced
  • 1 red bell pepper, diced
  • 4 cloves garlic, minced
  • 1 jalapeño, minced (keep the seeds)
  • 3 tablespoons ancho chile powder
  • 1 tablespoon New Mexico chile powder (can replace with half ancho/half cayenne)
  • 1 tablespoon cumin
  • 2 tablespoons pureed chipotle in adobo
  • 1 tablespoon tomato paste
  • 1 bottle of dark beer (I use porter)
  • 1 28-oz can of crushed tomatoes
  • 3 cups chicken stock
  • 1 large (or 2 small) butternut squash, peeled, seeded, and chopped into 1/2-inch cubes
  • 2 15-oz cans of low-sodium black beans, drained and rinsed
  • Salt + pepper
  • Cilantro, green onions, grated cheddar cheese, and Mexican crema for garnish

Directions:

  • Add bacon lardons to a cold Dutch oven and place over medium heat. Cook until crispy then remove with a slotted spatula and place on a plate lined with paper towels. Reserve for garnish.
  • Saute the onions in the rendered bacon fat until translucent. Add bell pepper, garlic, and jalapeño and cook for another minute to soften. Add the chile powders and cumin and cook for 30 seconds then add the chipotle and tomato paste and cook an additional 30 seconds. The mix should be very potent!
  • Add the bottle of beer and deglaze, making sure to scrape the bottom of the pot to get all the good stuff. Once the liquid has almost completely cooked off and the mixture looks dark and pasty, add the crushed tomatoes, chicken stock, and squash. Return to a boil then lower heat to simmer. Let cook for 40-45 minutes uncovered or until the squash is fork-tender. Add black beans and cook for an additional 15 minutes. Check for seasonings and add salt/pepper to taste.
  • Let cool slightly then serve in individual bowls with toppings on the side. Enjoy!

Tips:

  • This could easily be vegetarian/vegan by omitting the bacon and using a couple tablespoons of olive oil to cook the veggies and replacing the chicken stock with vegetable or mushroom stock.
  • To get that complex chili flavor it’s necessary to have chiles, dark beer, and tomatoes. Besides that you can mess around with the rest of the ingredients. Try different types of chiles – powders or dried chiles (soaked in hot water and pureed)!